Universal G-Code Sender (UGS)
Do not try anything in this guide until reading it through completely. For more information, check out the FAQ question Why is the plotting device running into the wall?
What is UGS?
UGS is the go to software for interacting with plotting devices. It offers a bunch of helpful tools to get started and can be used to send G-Code instructions and G-Code files to plotting devices.
Setup
Installation
Navigate to the UGS download page to get the software.
Connect the plotting device

- Open UGS and connect the plotting device to the computer, most likely via USB.
- Click the refresh button next to
Port. - From the
Portdrop down menu select the plotting device. Once the plotting device is successfully connected, theConnect or Disconnectbutton will turn orange.
Finding the plotting device
Device naming may not be intuitive. An easy way to figure out which device is the plotting device is to select a device from the drop down menu, and click the Connect or Disconnect button. Repeat until a successful connection is made. Note that the plotting device might have a different name depending on the USB port it is connected to. For help finding the plotting device, join us on Discord.
Get the plotting devices's dimensions
Do not try anything in this guide until reading it through completely. For more information, check out the FAQ question Why is the plotting device running into the wall?
- Open the jog controller.
- Select
millimetersfor units. - Set the
Step size XYto 10,Step size Zto 1,Feed Rateto 1,000. (For information on setting feed rate, check the [Get the plotting devices's feed rate](#get-the-plotting -devicess-feed-rate) section) - Move the plotter head to the most negative X direction (
X-) and most negative Y direction (Y-). If the plotter supports limit switches, send the G28 Command to move the plotter head to the limit switch. - For 3D printers only, attach the plotting instrument to the plotter head. (For help with 3D printer setup, check out Convert a 3D printer to 2D plotter guide) Move the plotter head in the Z Direction (
Z-orZ+depending on the 3D printer) until the point of the plotting instrument is a comfortable height (3mm is good) above the plotting surface. You can find a ruler for measuring Z-Height here. Write this number down, it'll be thez_navigation_heightvariable. - Switch to the Toolbox and Click
Reset Zero. This defines theX = 0,Y = 0, and for 3D printers only, theZ = 0starting point for the plotting device as the plotter head's current location. - Switch back to the Jog Controller. Move the plotter head to the most positive X direction (
X+) and most positive Y direction (Y+) it can go. Write these numbers down. - For 3D printers only, move the plotting head so that the plotting instrument's point is comfortably touching the plotting surface. This will most likely be
0. Write this number down, it'll be thez_plotting_heightvariable.
Reset Zero
Do not try anything in this guide until reading it through completely. For more information, check out the FAQ question Why is the plotting device running into the wall?
This step is not applicable if the plotting device has limit switches and get be reset with a G28 Command.
This step should be performed every time the plotting device is turned on. Additionally, it should be performed any time the plotter head is accidentally given coordinates that are outside of the bounds of the plotting device.
Repeat steps 1 through 6 from the getting the plotting device's dimensions section.
Get the plotting devices's feed rate
Do not try anything in this guide until reading it through completely. For more information, check out the FAQ question Why is the plotting device running into the wall?
-
Open the jog controller.
-
Select
millimetersfor units. -
Set the
Step size XYto 10,Step size Zto 1,Feed Rateto 1,000. (For information on setting feed rate, check the [Get the plotting devices's feed rate](#get-the-plotting -devicess-feed-rate) section) -
Click on the arrows to move the plotter head around the plotting surface.
-
Raise and lower the
Feed Rateuntil it moves at a speed that results in clean and fast plotting . This may take some experimentation to pick a good number. Write this number down.
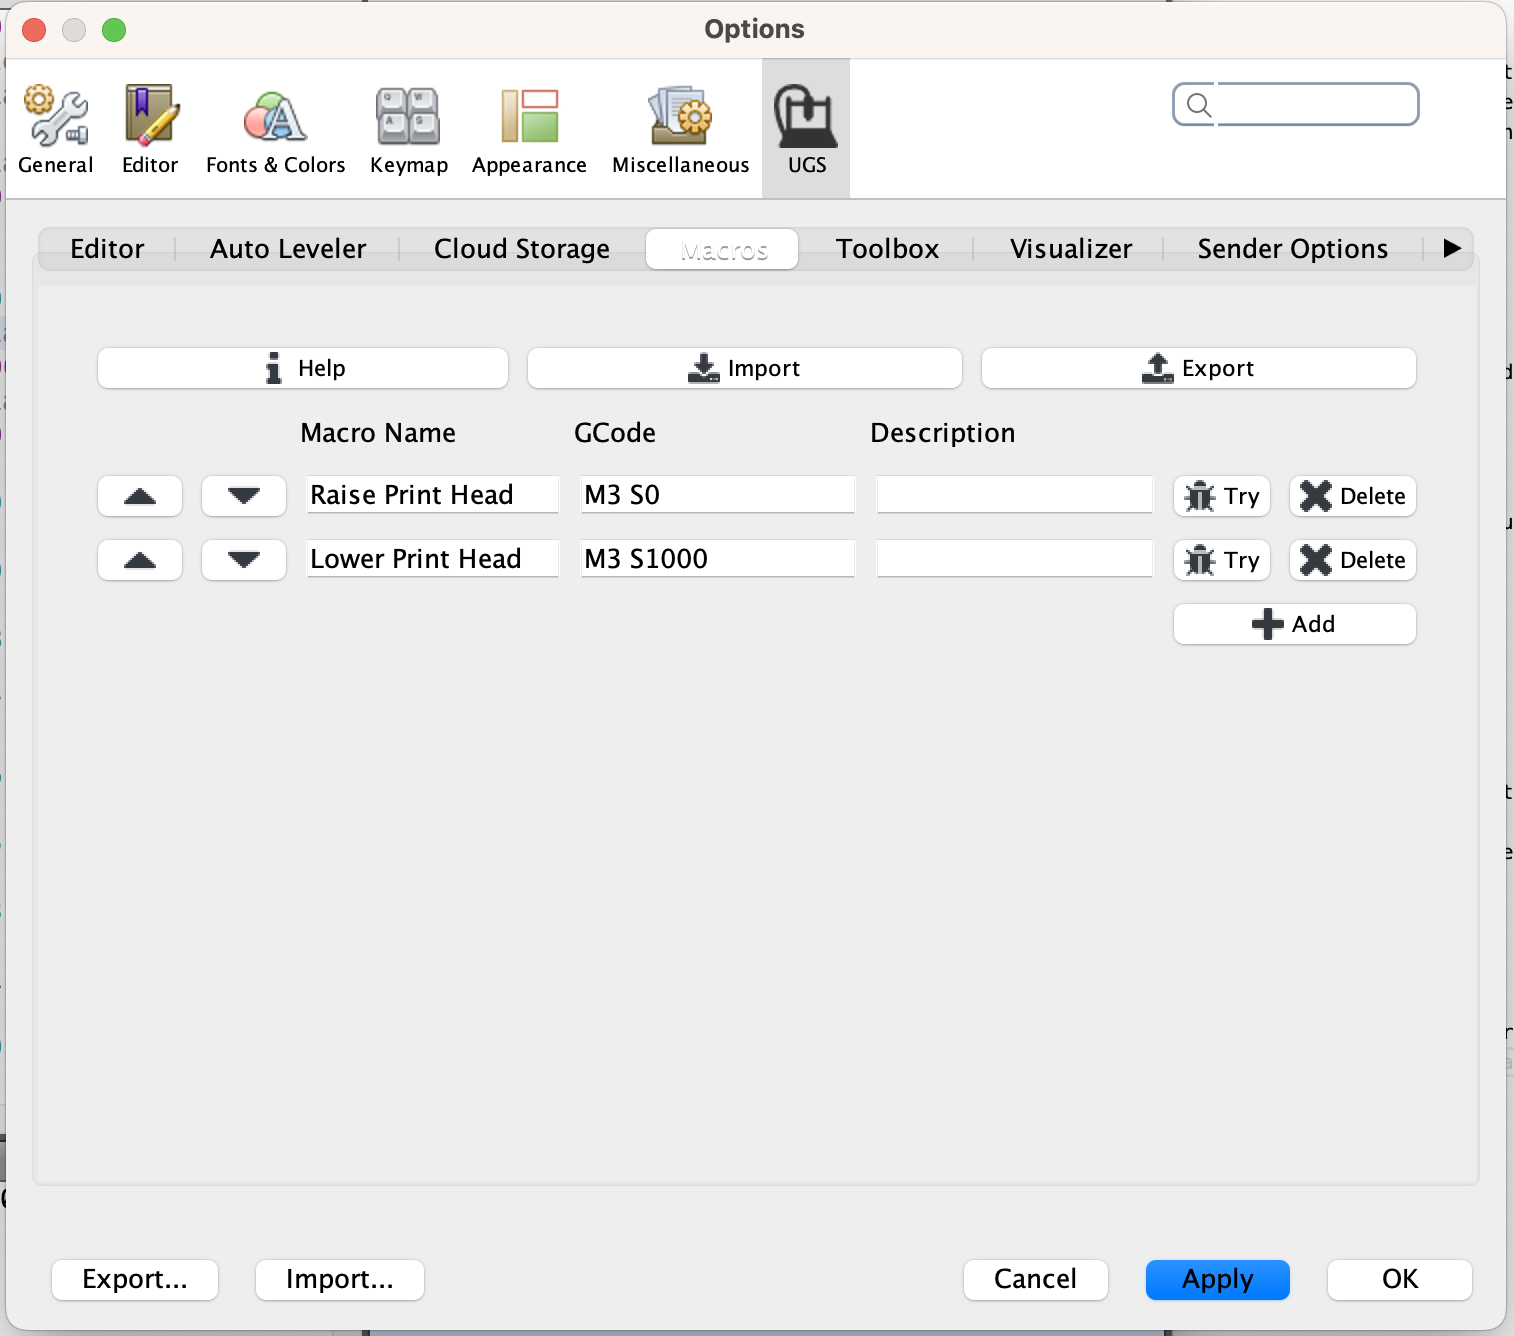
Creating Macros
Macros are a way to turn repeated interactions in UGS into clickable buttons. To create a macro, in UGS, click on the Machine menu item and then click Edit macros....
Below are some commonly used macros. Check out the G-Code Overview for more inspiration. To test that macros work, isntructions can be sent by typing them into the console.
2D Plotter Macros
The plotter head can be raised by sending the G-Code command M3 S0 and lowered by sending the code M3 1000.
3D Printer Macros
Follow the Get the plotting devices's dimensions section to get the Z heights for the 3d printer. The instruction for moving the Z Axis looks like G1 Z123. Replace 123 with the recorded values to make macros for raising and lowering the plotting head.
UGS Features
Below are a collection of features referenced in other parts of the documentation including the setup in the next section.
Controller State
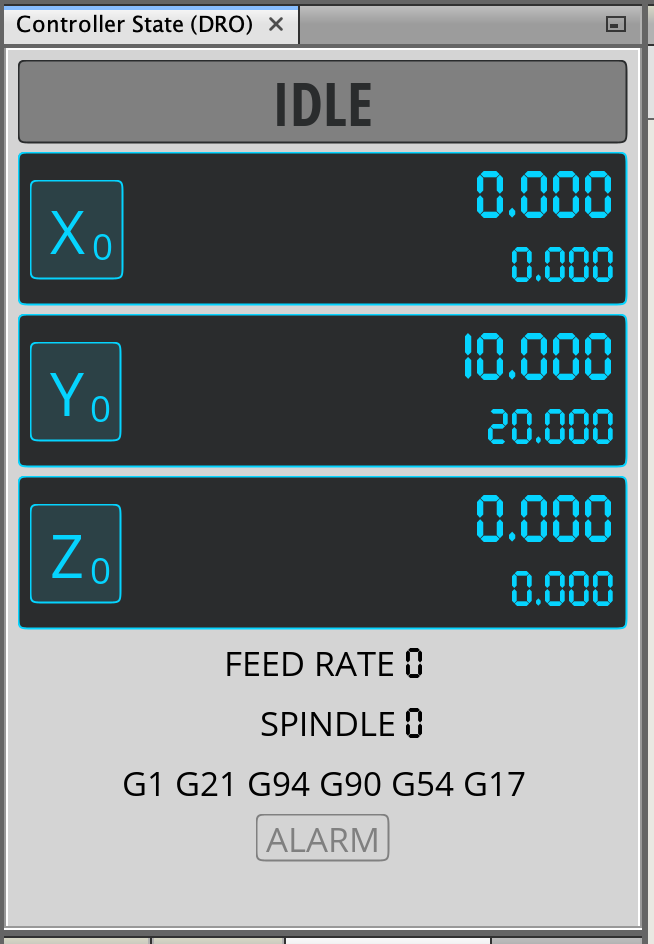
The controller state contains various details about the plotting device. Of interest are the X position (0.000) and the Y position (10.000). These coordinates will be used with the jog controller to determine the plotting device's coordinates. For 3D printers, the Z position will define the plotter head's lowered and raised positions.
Jog Controller
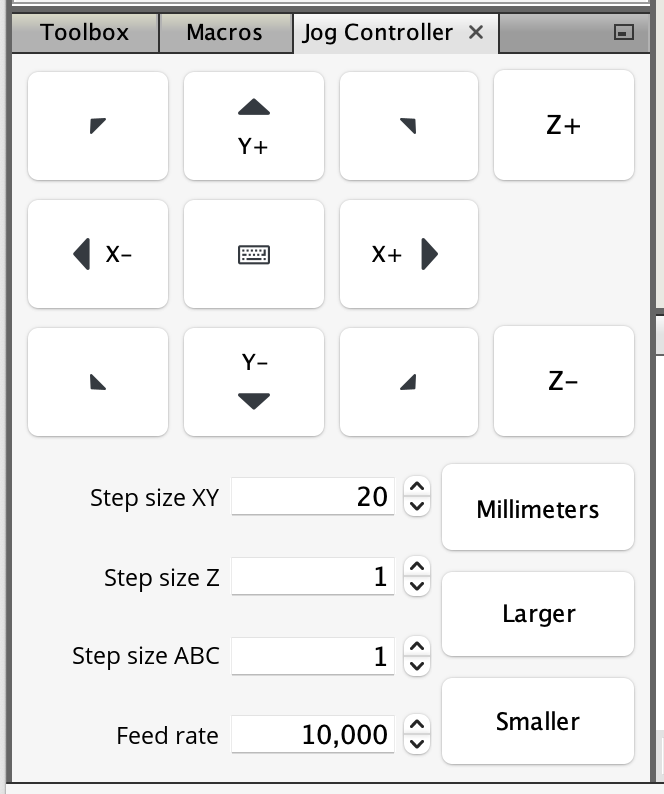
The jog controller controls the plotting device in real time. Instructions can be sent to move the plotter head in the X and Y directions. For 3D printers it'll also control the Z direction.
Toolbox
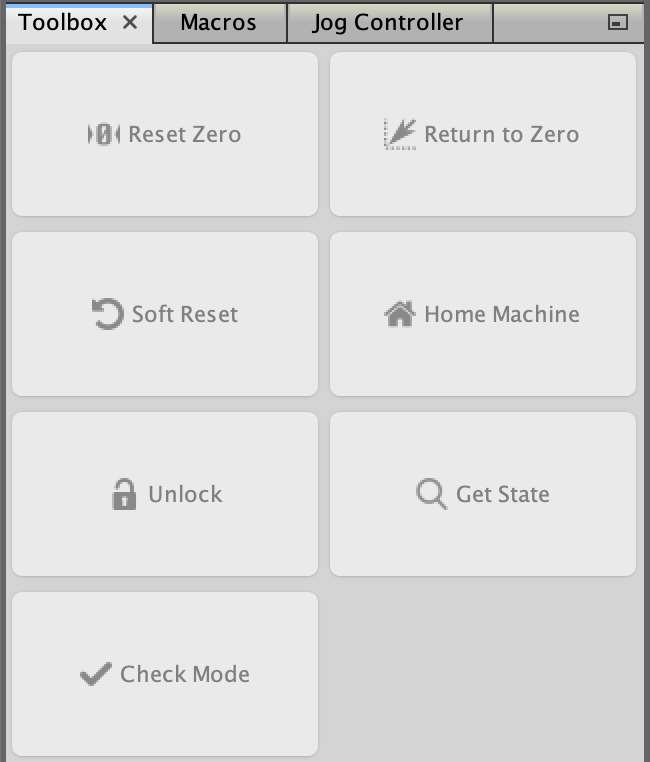
The toolbox contains several useful features listed below.
Reset Zero- This will set the plotter head's current position toX = 0,Y = 0, and optionallyZ = 0. All future movements will be made relative to this position.Return to Zero- This will return the plotter head to the position defined byReset Zero. Do not click this before reading the reset zero section.
Macros
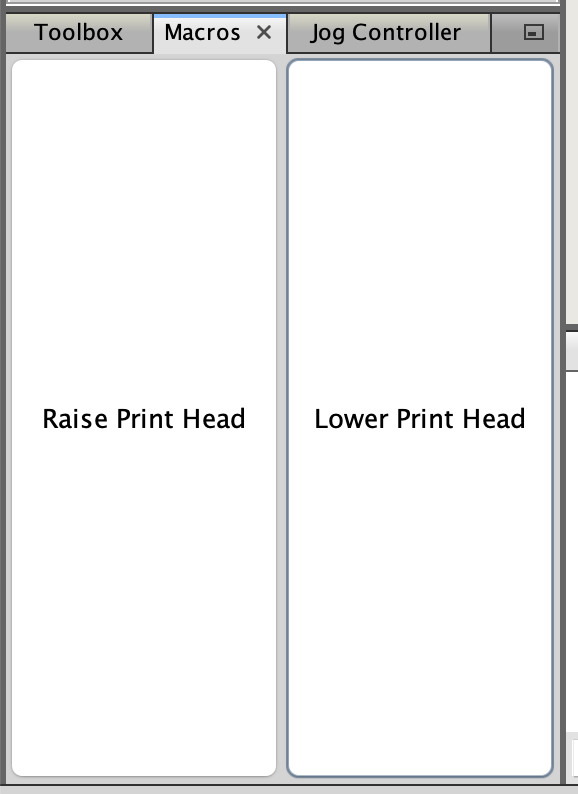
Macros are custom G-Code commands. Two examples here include Raise plotter head and Lower plotter head.
These instructions are specific to 2D plotters. Check out the G-Code Docs for other instructions that can be made.
Console
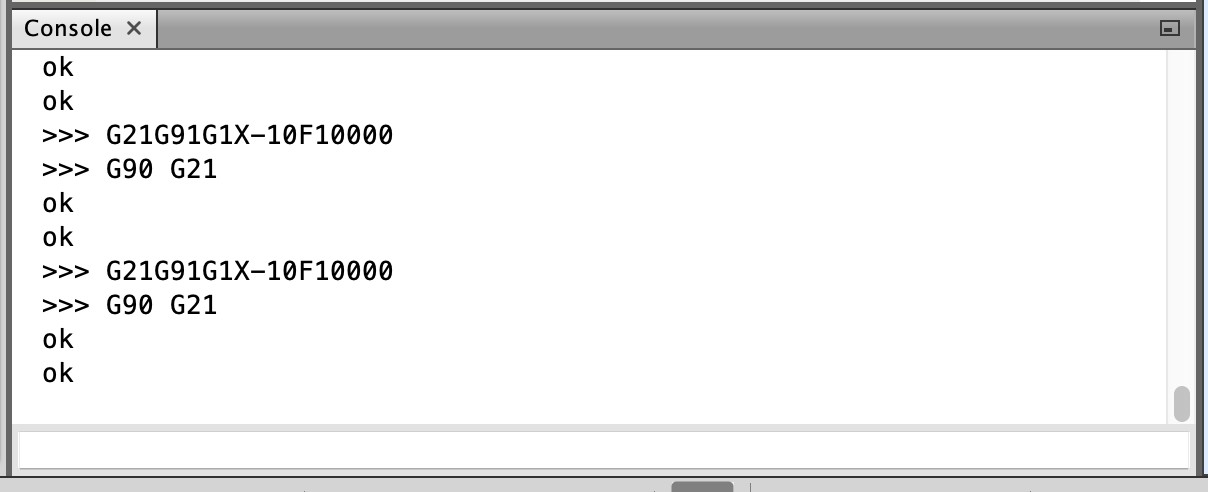
The console is used for sending commands to the plotting device.